
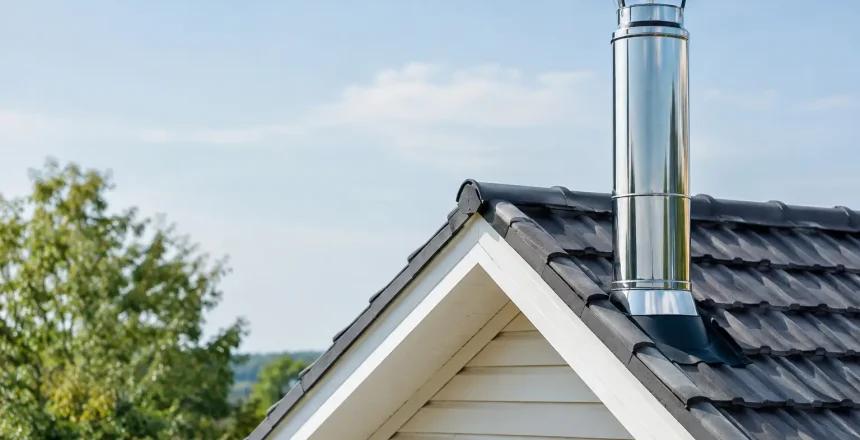
A bungalow can be an excellent home for a wood burning or multi-fuel stove, but its low roofline changes the flue design. Safe bungalow flue routes need more thought than simply taking the shortest path outside. The right route must provide reliable draw, meet clearance requirements, protect the building from heat and weather, and finish at a compliant terminal position above the roof.
A professional survey is the sensible starting point. It gives you a clear route from stove position to terminal, rather than an attractive stove installation that later proves impractical or costly to alter.
Why bungalow flue routes need careful planning
The main challenge with a bungalow is height. A flue serving a stove needs enough effective vertical rise to create a dependable natural draw. With only one storey between the room and the roof, there is less height available than in a two-storey property.
Roof shape matters too. A low-pitched roof, a rear extension, roof windows, nearby taller structures or a neighbouring property can all affect where the flue can terminate. Moving the terminal to achieve the right clearance may mean a longer external section than homeowners first expect.
This does not mean a bungalow is unsuitable for a stove. It means the flue route should be designed around the property, the chosen appliance and the applicable installation requirements. A properly planned system can look neat, perform well and give you 100% peace of mind.
Start with the stove position and a full survey
The stove location influences every decision that follows. An appliance placed against an external wall may suit an external twin-wall chimney system. A stove positioned closer to the centre of the bungalow may allow a more direct internal route through the ceiling and roof.
During a survey, an experienced installer will assess the available vertical height, roof construction, combustible materials, loft space, nearby openings and the likely terminal location. They will also consider the stove manufacturer’s instructions, because clearances and flue sizing are specific to each appliance.
A route that looks straightforward from the room can become more involved in the loft. Water tanks, structural timbers, insulation layout and roof trusses all need to be considered before work begins. Planning these details early helps keep the installation safe, tidy and predictable.
Using an existing chimney
If your bungalow has a traditional chimney breast, this can often provide the most discreet route. The chimney is assessed to confirm that it is suitable for the new stove installation, then a correctly sized liner can be installed where required.
This approach retains the character of the fireplace and usually keeps the flue largely out of sight. However, an existing chimney does not automatically guarantee a simple installation. Its internal path, height, terminal position and condition must all be suitable for the appliance being fitted.
Creating a new twin-wall route
Where there is no usable chimney, an insulated twin-wall stainless steel flue system provides a safe solution. These systems are designed for use through a property and roof, or externally up the outside wall.
For many bungalow owners, this is the route that opens up the most choice. It makes a stove possible in a garden room, open-plan living area or any suitable location without a chimney breast. The key is choosing the route that balances performance, appearance and compliance.
Internal and external routes: which is best?
An internal route usually rises from the stove through the ceiling, loft and roof. Because more of the flue remains within the thermal envelope of the home, it can support warmer flue gases and stronger draw. It is often the cleanest visual option outside, with only the terminal visible above the roofline.
The trade-off is that the system passes through the ceiling and roof. Safe distances from combustible materials, suitable shielding where needed and a weatherproof roof penetration are all essential. Loft insulation must also be managed correctly around the flue system.
An external route leaves through an external wall and rises vertically outside the bungalow. This can avoid taking the flue through internal rooms and may be the practical choice where the stove is against an outside wall. It can also make sense where roof structure limits an internal route.
External systems need particular care on bungalows because the flue may need to rise well above the eaves to reach a compliant terminal position. The visible chimney section can be more noticeable, and the system must be fully insulated and securely supported. The final route should never be selected on appearance alone.
Safe bungalow flue routes at the roofline
The terminal is not simply placed where the flue reaches the roof. Its final height and position are determined by the roof configuration, nearby obstructions and the clearance guidance in Approved Document J, alongside the chimney system manufacturer’s requirements.
A terminal too close to the roof slope, an opening window or a higher adjoining structure may be affected by wind conditions and may not disperse combustion products properly. On a bungalow, this is especially relevant because the terminal often sits closer to eaves, ridge lines and neighbouring roof levels.
A route near the ridge can sometimes reduce the amount of chimney visible above the roof and provide a more favourable position. That said, every property is different. A side elevation, rear extension or conservatory-style structure can change what works best.
The roof penetration also needs to be finished correctly. A suitable flashing system and careful detailing around the roof covering are vital to keep the property weather-tight for the long term.
Do not design around the shortest route
A short flue route is not always the best flue route. Stoves generally perform most reliably with a route that is as vertical and direct as the property allows. Changes in direction should be kept to a minimum, with any offsets designed properly rather than improvised around an obstruction.
The full system must also allow for safe inspection and chimney sweeping. This is one reason a professional design matters. The installer is looking beyond the route through the wall or roof to how the stove and flue will work together over years of normal use.
Draw can be influenced by the appliance, flue diameter, total height, route geometry and the exposure of the property. A bungalow in an open, windy location may need a different approach from a sheltered home with a tall chimney stack nearby. There is no one-size-fits-all route.
Fire safety, ventilation and carbon monoxide protection
The flue is only one element of a compliant stove installation. The hearth, stove clearances and protection of nearby combustible surfaces must be designed as a complete system.
Twin-wall chimney systems have defined clearance requirements that must be maintained wherever they pass through ceilings, lofts, walls and roof spaces. These requirements come from the system manufacturer and must never be reduced to make a route fit.
Ventilation also needs assessing. Modern homes can be more airtight than older properties, and the appliance must receive the air supply it needs to burn safely and efficiently. A suitable carbon monoxide alarm is required in the room containing a new solid fuel appliance, providing an essential additional safeguard for your household.
Certification gives you confidence
Using a HETAS registered engineer means the installation is completed with building regulations compliance in mind from the outset. Once the work is complete, you should receive the relevant documentation confirming the installation has been certified through the appropriate process.
This matters when you come to sell your home, arrange insurance or simply want confidence that the stove has been installed correctly. It also removes the uncertainty of trying to interpret flue clearances, roof terminal rules and appliance instructions yourself.
Before approving a proposed route, ask whether it provides enough effective height, how it will pass through the building, where the terminal will finish and how the installation will be certified. A clear answer to these questions is far more valuable than choosing the quickest-looking route.
The best bungalow flue design is the one that suits your home without compromising safety or performance. A detailed survey lets you make that decision with confidence, turning a potentially complex installation into a practical, compliant and enjoyable heating feature.