
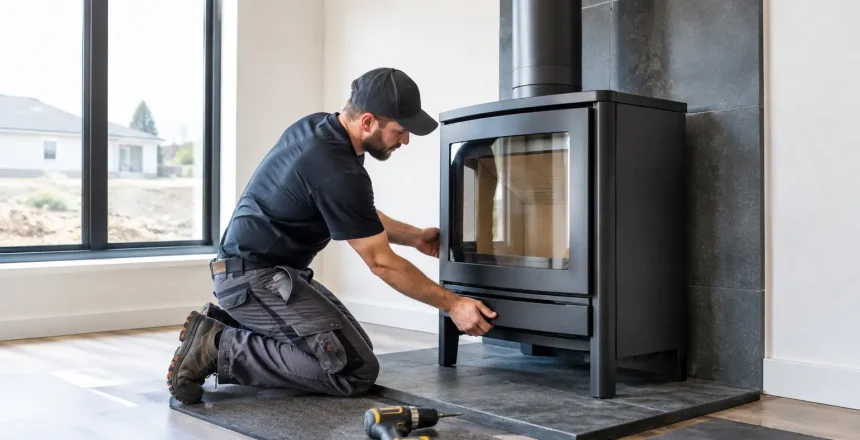
A stove installation in a new build example often begins before the plasterboard is fitted, not when the homeowner has chosen the stove. That is the advantage of a new property: the flue route, hearth and ventilation can be planned around the room from day one. It also means there is less room for assumptions. Modern homes are well insulated and airtight, so the installation must be designed carefully, installed correctly and certified properly.
For homeowners who want a log burner or multi-fuel stove as a focal point and a useful source of heat, a professionally managed installation removes the uncertainty. The survey establishes what is achievable, identifies the safest route for the chimney system and ensures the finished work meets the relevant Building Regulations and manufacturer requirements.
Stove installation in a new build example: the brief
Consider a detached new-build home with an open-plan kitchen and living area. The homeowner wants a 5kW wood burning stove positioned against an internal feature wall, with no existing chimney. The room has engineered flooring, a vaulted ceiling and a roof finish that must remain weatherproof.
The proposed stove is intended to provide occasional, comfortable heat rather than heat the entire house. That distinction matters. The room size, insulation standard, glazing, air permeability and the appliance output all affect whether a stove is suitable. A stove that is too powerful can make a well-insulated new-build room uncomfortably warm, even on a modest fire.
At the survey stage, a HETAS registered engineer would discuss the intended use, inspect the proposed position and confirm the appliance requirements. This is also the right point to decide whether the stove will be supplied as part of the installation package or whether the homeowner has already selected one. Either route can work, provided the appliance is suitable for the planned installation.
Designing the flue route before building work is finished
In this example, the most practical solution is a twin wall insulated stainless steel chimney system. It rises from the stove through the vaulted ceiling, continues through the roof space and exits through the roof at the required height.
A twin wall system is designed for homes without a masonry chimney. Its insulated construction keeps the flue gases warmer as they travel upwards, helping the stove draw correctly while protecting nearby building materials when installed to the specified clearances.
The route cannot simply be chosen because it looks central in the room. The installer must consider the full path from stove to termination point. That includes ceiling joists, roof timbers, the roof pitch, the position of windows and nearby openings, as well as the required separation from combustible materials. Where the ideal visual position clashes with structural elements, it may be necessary to move the stove slightly or alter the route within the limits of the system design.
In a new build, coordinating this work with the builder is particularly valuable. A correctly sized opening can be allowed for through the ceiling and roof, and the external finish can be formed neatly around the flashing. This avoids disruptive alterations after decoration has been completed.
Why flue height is not an afterthought
The chimney termination must be high enough and correctly positioned to disperse smoke safely and encourage reliable performance. Exact requirements depend on the roof layout, the location of nearby roof surfaces and the chimney system being used.
A short route may appear cheaper, but it is not automatically the right answer. Adequate height and a well-considered outlet position support stable draw and reduce the risk of smoke being affected by the roofline or surrounding structures. The engineer should confirm the design before the system is installed, rather than trying to solve performance concerns once the room is finished.
Hearth and wall protection in a modern room
The homeowner in this example wants a clean, contemporary finish. A slate hearth set flush with the floor can work well, but the specification depends on the stove and its tested temperature performance. Some appliances can be installed on a constructional hearth with a thin decorative surface, while others require more substantial thermal protection.
The same principle applies to the feature wall behind the stove. A non-combustible finish can create the desired look, but clearances still need to follow the appliance instructions. Decorative materials do not remove the need for correct spacing. The safest approach is to agree the stove model first, then build the hearth and wall treatment to suit its documented requirements.
This is where a fully managed service saves time. The installer can advise on the hearth footprint, stove position and flue centre line so that the building work supports the installation rather than creating avoidable restrictions.
Ventilation and airtightness in new homes
New properties commonly have far less uncontrolled airflow than older houses. While that improves energy efficiency, it changes how a solid-fuel appliance must be considered. Depending on the stove output, the property design and the appliance instructions, a dedicated air supply may be required.
In this example, the survey includes checks on ventilation provision and the presence of mechanical extract systems. Powerful kitchen extractors, bathroom fans and whole-house ventilation systems can affect room pressure. The aim is to make sure the stove has the air it needs to operate safely without compromising the home’s ventilation strategy.
There is no one-size-fits-all answer. A lower-output appliance in one new property may have different requirements from the same model in another. Your installer should assess the home as a whole and recommend a compliant solution, rather than relying on a rule of thumb.
What the installation day can look like
Once the design is agreed and the required building preparations are complete, the installation is planned around protecting the finished home and completing the work in the correct sequence. The stove is positioned on the prepared hearth, the chimney system is assembled to the approved route, and the roof penetration is finished to maintain weather resistance.
The engineer then checks the installation, including clearances, flue integrity, appliance operation and safe discharge of combustion products. A smoke test forms part of the commissioning process, alongside practical guidance on using the stove correctly. This is not just a handover formality. Good operation from the first use helps protect the appliance, supports cleaner burning and gives the homeowner confidence.
For a newly built home, the installer may need to coordinate timings with other trades. Roofing, plastering, flooring and final decoration all influence when certain stages should happen. The best sequence depends on the build programme, but planning early usually results in a tidier finish and fewer compromises.
Certification and Building Regulations
A solid-fuel stove installation is not simply a cosmetic home improvement. It must comply with the applicable Building Regulations, including requirements relating to combustion appliances and flues. When the work is completed by a HETAS registered installer, it can usually be self-certified through the relevant competent person scheme, with the homeowner receiving the appropriate certificate.
Keep this documentation with your property records. It provides evidence that the work has been completed through the correct certification route and is useful when selling or remortgaging the home. If an installation is not carried out through a competent person scheme, Building Control approval may be needed instead.
Planning permission is not normally required for every new-build stove project, but this depends on the property, its location and the external changes proposed. Listed buildings, conservation areas and development-specific conditions can alter the position. A proper survey is the place to identify any issue before work begins.
Making the right decisions early
The strongest new-build stove installations are designed as part of the room, not fitted around obstacles at the end of the project. Choose the stove output for the way the room will actually be used, allow for the full chimney route, and confirm hearth, clearance and ventilation requirements before final finishes are ordered.
Stove Specialists UK can walk homeowners through these decisions, from the initial free quote to a HETAS-certified installation. Whether your build is at first-fix stage or nearing completion, an on-site assessment gives you a clear, practical route to a safe stove installation and the warm focal point you had in mind.