
An external flue can make a wood burning or multi-fuel stove possible in a home with no usable chimney, but it should never be treated as a simple pipe fixed to an outside wall. This external flue planning guide explains what needs to be considered before installation, so your stove looks right, performs properly and meets the required safety standards.
For many homeowners, an external twin wall flue is the practical answer when opening up an old fireplace is not suitable, a chimney is unavailable, or a new-build property has been designed without one. The result can be a clean, efficient focal point and a dependable source of heat. Getting there depends on a careful survey and a route designed specifically for your property.
Start with the stove, not the flue
A flue system must be matched to the appliance it serves. Before deciding where it will run externally, your installer needs to know the stove model, its output, the flue outlet size and whether it is approved for the fuel you intend to burn.
This matters because the flue is responsible for carrying combustion gases safely away from the stove. A route that is too short, poorly positioned or inadequately insulated can lead to weak draw, smoke entering the room, excessive condensation and disappointing stove performance.
The room itself also needs assessing. The proposed stove position affects the hearth, clearances to combustible materials and, where needed, the ventilation provision. Moving the stove by even a small distance may create a much more straightforward and discreet external flue route.
Choose the most suitable external flue route
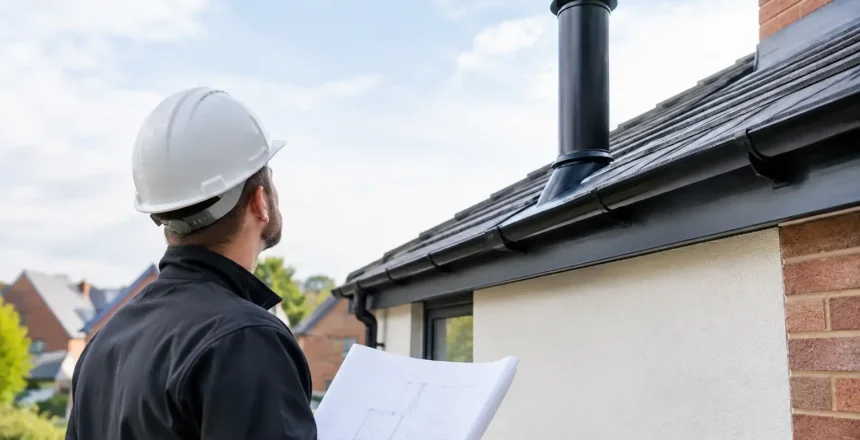
In most installations, a twin wall insulated stainless steel chimney system passes from the stove through an external wall, rises vertically up the outside of the building and terminates above the roofline. Insulation is essential because it helps the flue gases stay warmer, supporting a reliable draw while keeping safe separation from the building fabric.
The neatest route is not always the best route. A flue may need to avoid windows, roof overhangs, gutters, balconies, conservatories, neighbouring buildings or changes in roof level. It should be planned with the terminal position in mind, rather than simply taking the shortest path from the stove to the nearest wall.
Bends can sometimes be accommodated, but they introduce resistance into the system. A predominantly vertical route is generally preferable. Where an offset is necessary, it should be kept as simple as possible and designed in line with the appliance instructions and applicable installation standards.
An experienced installer will also consider how the system will look from the garden, driveway and neighbouring properties. A well-planned flue can be positioned to remain practical without dominating the elevation of the house.
Plan terminal height and clearances carefully
The top of the flue is one of the most important details in the whole design. Its height and location affect how well the stove draws and whether smoke can disperse safely. A terminal that sits in turbulent air around the roof, or too close to an opening window or nearby structure, can create avoidable problems.
Clearance requirements vary according to the building layout, roof type, flue route and appliance manufacturer guidance. For that reason, homeowners should be cautious about relying on a fixed measurement seen online. The right termination height for one detached house may not be right for a bungalow, terrace, extension or property close to taller neighbouring buildings.
During a survey, the installer should assess roof ridges, parapets, dormers, eaves and adjoining properties. They will also consider whether smoke could affect your own windows, a neighbour’s windows or regularly used outdoor areas. Good planning at this stage avoids costly alterations after the installation is complete.
Check planning permission before committing
Many external flues can be installed under permitted development rights, but this is not automatic in every situation. Listed buildings, properties in conservation areas, flats, maisonettes and homes with particular planning restrictions can need additional checks before work begins.
The appearance and location of an external flue may also be more sensitive where it faces a highway or forms a prominent part of the building frontage. If your property is subject to an Article 4 Direction or another local restriction, permitted development rights may be limited.
It is sensible to confirm the position early, especially if you are buying a stove before a survey. Planning considerations and Building Regulations are separate matters: having one does not remove the need to satisfy the other. A professional installer can explain the likely route and highlight when further confirmation from the local planning authority is advisable.
Building Regulations and HETAS certification
A stove installation must comply with Building Regulations, including the requirements relating to combustion appliances and flue systems. This covers much more than the visible chimney. It includes the hearth arrangement, safe distances from combustible materials, flue construction, terminal location, ventilation and carbon monoxide alarm provision.
Using a HETAS registered installer gives homeowners a clear route through this process. Following a compliant installation, the work can be notified through the competent person scheme and you should receive the appropriate certificate for your records. This is valuable when selling your home, making an insurance enquiry or simply demonstrating that the stove has been fitted correctly.
Stove Specialists UK plans each installation around compliance from the outset, rather than treating certification as an afterthought. That approach gives you 100% peace of mind that the practical details have been considered before installation day.
Consider the wall construction and building layout
The wall penetration is a safety-critical area. The system must pass through the wall using the correct components and specified clearances, with suitable weathering externally and a neat internal finish. The wall type can affect the approach, whether it is solid brick, cavity construction, timber frame or a more modern build-up.
Timber-clad walls, extensions, garden rooms and properties with complex roof details deserve particular attention. Combustible materials may be concealed behind finished surfaces, which is why assumptions should not be made from a quick visual inspection.
The external section also needs secure support at the correct intervals. It must be designed to cope with its height, wind exposure and the load imposed by the system. This is one reason an on-site survey is far more useful than selecting a generic kit based on photographs or rough measurements.
Think about performance in everyday use
A correctly designed external flue should encourage the stove to light easily and burn cleanly. The insulated construction helps maintain flue gas temperature, particularly as the flue rises through colder outside air. However, the system still relies on the right stove, suitable fuel and sensible operation.
Wood should be properly seasoned or kiln-dried, with a moisture content of 20% or below. Burning wet wood creates more smoke and deposits, reduces heat output and makes it harder for any flue system to perform at its best. If you are choosing a multi-fuel stove, make sure the appliance is suitable for the fuel you plan to use.
Your installer should also discuss the likely heat output for the room. An oversized stove can make a living area uncomfortably warm, encouraging low-temperature burning that is not ideal for efficient operation. The right-sized appliance, installed with the right flue, is a better long-term choice than simply selecting the highest output available.
External flue planning guide: questions to ask at survey
A proper survey is your opportunity to make informed decisions before work is booked. Ask where the flue will leave the room, how high it needs to rise, whether any offsets are required and how it will relate to your roof, windows and neighbouring properties.
You should also ask what building work is included, how the internal stove area will be finished, what certification you will receive and whether the quotation covers the complete compliant system. A clear written proposal avoids confusion and helps you compare like for like when considering quotes.
Photographs, approximate room dimensions and details of your preferred stove can be helpful before a visit, but they do not replace a physical assessment. The final design should only be confirmed when the installer has seen the property and checked the proposed route.
Budget for the complete installation
External flue costs vary because no two properties are the same. A straightforward ground-floor installation with a clear vertical route will usually be less involved than a tall property, a complex roofline or a system requiring careful routing around an extension.
When comparing prices, focus on scope as well as the total figure. A lower initial quote may not include the same flue height, hearth work, wall penetration, finishing work, notification or certification. The best value is a safe, compliant installation that has been properly designed for the property, not a shortcut that creates problems later.
A well-surveyed external flue gives you the freedom to add a stove where it makes sense for your home. With the route, clearances and certification handled properly from the beginning, you can look forward to a warm, attractive installation with confidence.