A chimney liner is hidden from view once your stove is installed, but it is one of the most important decisions in the whole project. This guide to chimney liner installation explains what homeowners should expect, why the right specification matters, and where a professional survey makes the difference between a stove that simply looks good and one that works safely for years.
For a wood burning or multi-fuel stove, the flue system must carry combustion gases safely from the appliance to the outside. A liner creates a continuous, suitable route within an existing chimney. It also helps the stove draw correctly, protects the chimney structure from flue gases and supports a clean, compliant installation.
A guide to chimney liner installation: start with the survey
No two chimneys are quite the same. An older property may have a tall chimney stack, bends in the flue route, an open fireplace, or changes made by previous owners. A newer home may need a completely different solution, such as an insulated twin wall chimney system. That is why a proper site survey should always come before choosing a liner or booking an installation date.
A HETAS registered engineer will assess the chimney route, its height, the fireplace opening, access at roof level and the proposed stove. They will also consider ventilation, hearth requirements, clearances to combustible materials and whether the existing chimney is suitable for lining. This is not unnecessary formality. These details determine whether the finished system will perform as intended and meet Building Regulations.
The survey is also the right time to discuss how you use your home. A small room, a modern insulated house and a large open-plan living space can all need different stove and flue recommendations. The aim is a practical heating feature that feels right for the room, not an oversized appliance or an unsuitable flue arrangement.
Why a chimney liner may be needed
A traditional masonry chimney is not automatically suitable for a modern stove. Over time, the inside of a chimney can become uneven or oversized, and its original construction may not provide the controlled flue route a closed appliance requires. A correctly selected stainless steel flexible liner gives the smoke and gases a dedicated path from the stove to the chimney terminal.
Lining is particularly common when installing a stove into an existing fireplace. It can improve draw, reduce the risk of leakage into the chimney structure and make sweeping more straightforward. However, a liner is not a one-size-fits-all answer. The chimney’s layout, the stove manufacturer’s instructions and the fuel you intend to burn all affect the specification.
In some homes, there is no usable chimney route at all. In that situation, an insulated twin wall stainless steel system can provide a safe external or internal route. This must be designed around the property rather than treated as a standard add-on, especially where it passes through ceilings, walls or the roof.
Selecting the correct liner diameter and grade
The liner must match the stove and the installation design. Its diameter is normally guided by the appliance manufacturer’s instructions and relevant UK requirements. Choosing a smaller route simply to make fitting easier can restrict flue gases and cause poor performance. Going larger is not always better either, as a flue that is too large may cool gases too quickly and weaken the draw.
For many wood burning and multi-fuel stove installations, a 150mm liner is commonly specified, but there are exceptions. Certain exempt appliances may allow a 125mm liner when used under the required conditions. Your engineer should confirm this from the stove documentation rather than rely on a general rule.
The grade of stainless steel matters too. A liner needs to withstand the conditions created by the fuel and appliance. Wood burning, smokeless fuel and multi-fuel use can place different demands on the flue system. This is why a professional installation includes specifying suitable materials from the outset, rather than selecting on price alone.
What happens during chimney liner installation
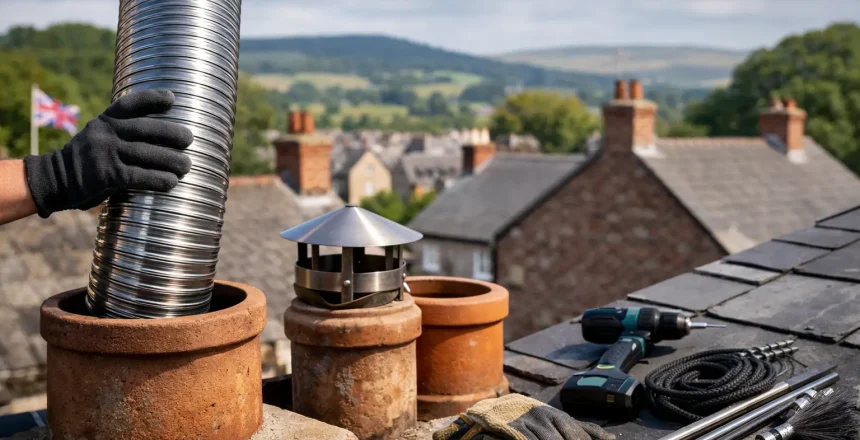
On installation day, the team will protect the work area and prepare the fireplace opening or stove location. The chimney is checked and swept before the liner is introduced from the top of the stack or, where appropriate, managed from below. The chosen method depends on access, the route of the chimney and the building itself.
The liner is carefully guided through the flue route until it reaches the correct position for connection to the stove. It is then secured at the chimney top with an appropriate terminal arrangement, while the lower section is connected to the appliance through the correct flue pipe arrangement. The fireplace opening is closed off with a suitable plate so that the installation is neat, controlled and properly finished.
Where the chimney passes through a cold external section, insulating the liner may be recommended. Insulation can help keep flue gases warmer, supporting better draw and reducing the likelihood of condensation within the system. It is not required in every property, but it is a worthwhile discussion where chimney performance or layout suggests it would help.
A good installation is about much more than getting the liner down the chimney. The stove must sit at the correct distance from surrounding materials, the hearth must meet the appropriate requirements, and the flue route must be secure throughout. If building work is needed to create or alter the fireplace opening, this should be planned as part of the same project rather than left as an afterthought.
Testing, commissioning and certification
Once the stove and chimney liner are fitted, the system needs to be tested and commissioned. Your installer will check the flue draw, confirm that smoke is travelling correctly through the chimney and make sure the installation is safe to use. They will also explain how to light and operate the stove efficiently, including the importance of using properly seasoned wood with a low moisture content.
If the installation is completed by a HETAS registered engineer, you should receive the relevant HETAS certificate. This is your evidence that the work has been self-certified in line with Building Regulations. Keep it with your property documents, as it can be requested by insurers and is useful when selling your home.
Do not overlook the carbon monoxide alarm. It must be installed in the same room as the solid fuel appliance and positioned in accordance with the manufacturer’s instructions. This small requirement is a vital layer of protection for everyone in the household.
Common decisions that affect cost and timescale
The most straightforward jobs involve a clear, accessible chimney and a prepared fireplace. Costs and timescales can change where there are difficult roof conditions, substantial chimney height, restricted access, bends in the flue route, or building work required around the stove opening. A full survey allows these factors to be identified early, so you receive a clear recommendation rather than surprises on installation day.
It is also worth deciding whether you are supplying the stove yourself or want a complete supply-and-fit service. Both can work well, provided the proposed appliance is confirmed as suitable before work begins. A professional installer should be happy to advise on compatibility, flue sizing and the practical requirements of your chosen model.
When to call a HETAS registered installer
Chimney liner installation is not a job to treat as a simple DIY upgrade. The work involves roof access, working at height, appliance clearances, fire safety and legal compliance. A HETAS registered engineer can design the complete system, fit it correctly and provide the certification that gives you confidence in the finished result.
Stove Specialists UK provides fully managed stove and chimney lining installations, from the initial survey through to commissioning and certification. For homeowners across the Midlands and surrounding counties, that means one experienced team can manage the technical details while you focus on choosing the stove and finish that suit your home.
A well-planned liner installation gives your stove the safe route it needs to perform properly. Start with a survey, ask clear questions about the proposed specification, and choose an installer who can leave you with the right paperwork as well as a warm, welcoming room.