
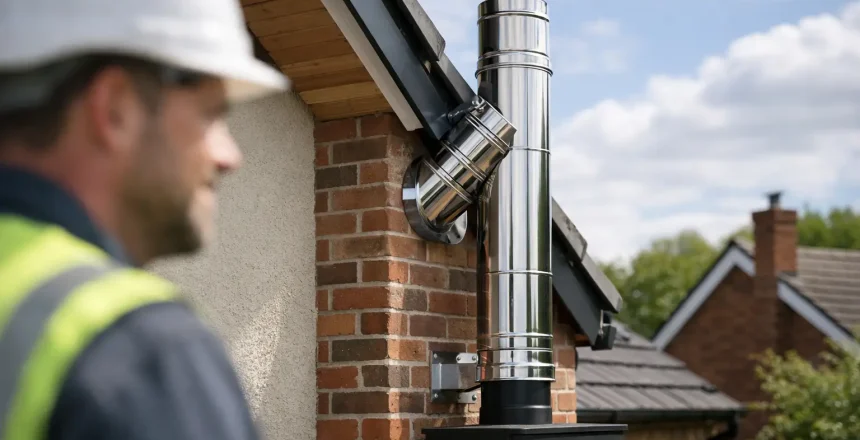
A homeowner wanted a wood burning stove to become the focal point of their newly renovated living room, but the property had no usable chimney breast. This twin wall flue installation case study shows how a professionally designed external chimney system made that possible without compromising safety, appearance or Building Regulations compliance.
The customer’s priority was clear: a reliable stove installation that provided real warmth, looked right in a modernised period home and came with the correct certification. They did not want uncertainty around planning the flue route, organising different trades or working out technical clearances themselves. The answer was a fully managed installation, from site survey through to commissioning and certification.
Twin Wall Flue Installation Case Study: The Brief
The living room had a suitable external wall but no existing chimney stack. This is a common situation in extensions, converted properties and homes where an original fireplace has been removed. A conventional chimney liner was not an option because there was no masonry flue to line.
The proposed solution was an insulated twin wall stainless steel chimney system. Unlike a single-skin stove pipe, twin wall flue is designed to form the full chimney route, carrying flue gases safely from the appliance to a suitable termination point above the roofline. Its insulation helps keep gases warmer as they travel upwards, supporting a better draw while protecting nearby building materials from excessive heat.
Before recommending the system, the installer assessed the room, the proposed stove position, the wall construction, the route outside the property and the roof geometry. These details matter. A flue route that looks simple from ground level can become more involved when roof overhangs, upper windows, eaves and neighbouring buildings are considered.
The homeowner also wanted the external section to be neat and proportionate. In this case, a vertical route rising from the rear elevation was selected. It provided the clearest path to a compliant terminal position and kept the visible flue away from the main frontage of the property.
Survey First, Not Assumptions
A proper survey is where a safe installation starts. The stove output was considered alongside the room size, ventilation needs and the property’s insulation levels. Choosing an oversized stove can make a room uncomfortably hot and encourage low-temperature burning, while an undersized appliance may not deliver the heat the homeowner expects.
The survey also established the correct hearth arrangement. The stove required a non-combustible base of suitable dimensions, with clearances around the appliance determined by the manufacturer’s instructions. These clearances cannot be guessed or adjusted simply to make a stove fit a preferred corner.
For the flue, the key considerations included the distance from combustible materials, the support method for the external chimney, the direction of the route and the final terminal height. The external wall required properly positioned brackets to support the system without placing unnecessary load on the appliance or the internal connecting flue.
This planning stage is also the time to identify whether additional building work is required. Here, a carefully formed wall opening was needed to pass the flue safely from the room to the outside. The opening and surrounding construction were finished to maintain a clean appearance while meeting the specified separation distances.
Selecting the Right Twin Wall Route
There is no single twin wall flue layout that suits every property. In some homes, the chimney can rise internally through upper floors before exiting through the roof. In others, an external route is more practical, less disruptive and more cost-effective. It depends on the building layout, access, visual preference and the most suitable route for safe operation.
For this project, the flue rose vertically from the stove, passed through the external wall using the correct insulated components and continued up the outside of the house. Once above the eaves, the chimney extended to a height that allowed it to discharge safely and effectively.
Keeping the route as vertical as possible was a deliberate choice. Every change of direction adds resistance to the flow of flue gases. Although bends can be used where necessary, an unnecessarily complex route can affect performance and may require more detailed consideration during design.
The chosen finish was stainless steel, which suited the property’s mix of traditional brickwork and contemporary windows. Some homeowners prefer a darker finish where the flue is visible on a painted or rendered elevation. The best choice is often a balance between long-term appearance, the building’s character and the available chimney system specification.
Installation Day: What Happened On Site
With the route agreed, the installation could be completed in a planned sequence. The team protected the working area, prepared the hearth location and created the wall penetration with the required clearances. The stove was then positioned accurately on the hearth, ensuring it was level and located in accordance with the manufacturer’s requirements.
Inside, the connection from the appliance to the twin wall system was formed using the appropriate flue components. Outside, the insulated chimney sections were assembled and secured progressively with purpose-designed wall supports. Each joint and support position was checked as the system rose up the elevation.
The terminal height was particularly important. A flue must terminate in a position that reduces the risk of smoke or combustion products affecting the property, nearby openings or neighbouring homes. Height requirements are not simply about making the chimney look balanced. They are directly linked to safe discharge and dependable stove performance.
A carbon monoxide alarm was fitted in the correct location as part of the installation. This is an essential safety measure for solid-fuel appliances, but it does not replace correct design, suitable ventilation or professional commissioning. The full system must work together.
Testing, Commissioning and Certification
Once the physical work was complete, the stove and flue system were checked before being handed over. The engineer confirmed that the appliance, hearth, flue route, clearances and terminal arrangement met the relevant requirements. The stove was then commissioned so the homeowner could understand how it operated.
This handover is often where homeowners gain the most confidence. They were shown how to light the stove correctly, establish a good fire, manage the air controls and use suitable dry fuel. Burning properly seasoned wood with a moisture content of 20% or below helps the stove operate more cleanly and efficiently. Wet wood creates more smoke, more deposits in the flue and less useful heat in the room.
The homeowner received the appropriate HETAS certification for the completed work. This provides evidence that the installation has been carried out by a competent registered installer and gives reassurance for future property records. It is one of the major advantages of using a HETAS registered engineer rather than treating a stove installation as a simple decorating project.
The Result for the Homeowner
The finished installation gave the room a purposeful heating feature without the cost and disruption of constructing a full masonry chimney. The stove created a warm focal point, while the external twin wall flue offered a practical route that was safe, compliant and visually considered.
There were trade-offs. An external chimney is visible, and its final position must be chosen carefully. An internal route can hide more of the system, but it may involve work through ceilings, floors and the roof. Neither option is automatically better. The right answer comes from surveying the property and designing around its real constraints.
For homeowners considering a stove where no chimney exists, the key lesson is not to start with a flue route picked from photographs. Start with a survey. A competent installer can assess the appliance location, heat requirement, hearth, ventilation and chimney design together, then explain what is possible and why.
Stove Specialists UK can provide that complete, safety-first approach, with clear recommendations, a free quote and a 100% Peace of Mind installation. If you are planning a stove in a home without a chimney, an early survey can turn a complicated idea into a practical, certified installation with a result you can enjoy for years.