A flexible liner is hidden inside the chimney, but it has a direct effect on how safely and efficiently your stove operates. The flexible flue liner installation steps must be planned around your property, chimney condition and chosen appliance – not treated as a one-size-fits-all job. A correctly specified and installed liner helps carry combustion gases safely outside, supports a reliable draw and gives you the confidence that your installation meets the required standards.
For most homeowners, the best route is a fully managed installation by a HETAS registered engineer. That means one experienced team can assess the chimney, fit the liner, connect the stove, carry out the safety checks and provide the certification you need.
Why a flexible flue liner may be needed
Older masonry chimneys were often built for open fires, not modern wood burning or multi-fuel stoves. Their internal surfaces can be uneven, oversized or unsuitable for the controlled flue gas temperatures produced by a closed appliance. A flexible stainless-steel liner creates a dedicated route within that chimney.
It is not automatically required for every chimney, but it is often the right recommendation where a survey shows that the existing flue is not suitable for the proposed stove. The final decision depends on chimney height, route, internal condition, stove output, fuel type and the appliance manufacturer’s instructions.
A liner is not the same solution as an insulated twin wall chimney system. Flexible liners are used inside an existing suitable masonry chimney. Where there is no usable chimney route, a purpose-designed insulated system may be the better option.
Flexible flue liner installation steps explained
1. Surveying the chimney and planning the installation
The work starts with a detailed site survey. Your installer assesses the chimney route, measures the fireplace opening, checks access at roof level and considers the location of combustible materials around the proposed stove. They will also establish whether the hearth, ventilation and clearances can meet Building Regulations and the stove manufacturer’s requirements.
This stage is where practical issues are identified before fitting day. For example, a narrow or offset chimney may affect the liner diameter that can be installed, while a tall chimney can influence how the stove draws. A clear survey avoids surprises and gives you a quote that reflects the work actually required.
2. Selecting the correct liner specification and diameter
The liner must suit both the appliance and the fuel being burned. Diameter is particularly important. A liner that is too small can restrict flue gases and affect performance, while an unnecessarily large liner may cool gases too quickly and weaken the draw.
Your engineer will follow the stove manufacturer’s instructions alongside the relevant UK guidance. The grade of stainless steel also matters, especially where a multi-fuel stove is planned. This is not a detail to guess at from an online measurement. The correct specification protects the long-term performance of the entire installation.
3. Preparing the room, fireplace and chimney route
Before the liner is introduced, the work area is protected and the chimney is prepared. The fireplace opening may need to be opened to the correct size, and suitable access is arranged for work at the chimney pot. A professional team will keep disruption controlled, using appropriate protection for floors and nearby furnishings.
The chimney route must be clear enough for the liner to pass without forcing it through tight bends. If the survey identifies a route that will not safely accommodate the intended liner, the installer should explain the alternatives before work begins. Forcing an unsuitable liner into place is not a compliant shortcut.
4. Installing the flexible liner through the chimney
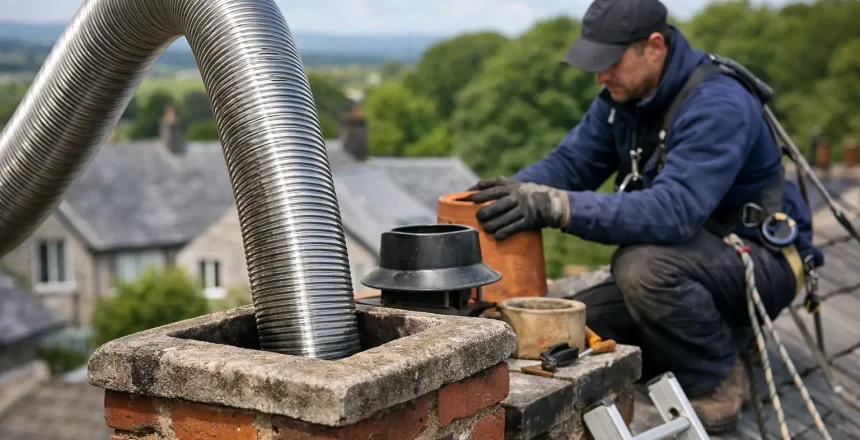
The liner is normally lowered from the top of the chimney using controlled methods and specialist equipment. Depending on the chimney layout and safe access, the installation method can vary. What does not vary is the need to follow the liner manufacturer’s stated direction of installation, ensuring the overlaps are positioned to guide condensate and flue gases correctly.
The liner should run continuously through the chimney wherever possible, without unnecessary restriction or strain. Care is taken around chimney bends, as sharp turns can make installation more difficult and may affect the final route. This is one reason experienced fitting matters – the visible work inside the room is only a small part of the job.
5. Securing the liner at the chimney top and fireplace opening
Once the liner is in position, it is securely supported at the top of the chimney and finished with an appropriate weathering arrangement. This keeps rain and debris out of the flue route while allowing combustion gases to discharge safely. The chimney pot and surrounding masonry must be stable enough to support the finished arrangement.
At the lower end, the liner is connected to the stove flue pipe using suitable, manufacturer-approved fittings. The fireplace opening is then closed off with a correctly fitted register plate or closure system. This helps prevent heat and debris entering the chimney void and gives the installation a neat, professional finish.
6. Installing the stove with the required clearances
The stove is positioned on a suitable hearth and connected to the completed flue system. Clearances to walls, beams, mantel areas and other combustible surfaces are checked carefully. These distances are not simply a matter of appearance – they are fundamental fire-safety requirements.
Ventilation is also considered. Some properties need a permanent air supply to support safe combustion, particularly where the stove output and the home’s air-tightness make this necessary. Your installer will explain what applies to your home rather than adding unnecessary work as standard.
7. Testing, commissioning and certification
The final stage is where the installation is proven, not merely finished. The engineer carries out smoke testing and checks that the chimney has an effective draw. They will confirm that flue gases are travelling safely up and out of the property, with no signs of leakage or spillage into the room.
A carbon monoxide alarm must be fitted in the same room as the stove in line with the applicable requirements. The stove is then commissioned, and you should be shown how to operate it correctly, including how to light it, manage the air controls and use suitable fuel.
When the work is complete, a HETAS registered installer can self-certify the installation through the relevant process. You receive the appropriate documentation for your records, giving you evidence that the work has been completed in accordance with Building Regulations.
What can affect the installation cost and timescale?
Flexible flue liner work is often straightforward, but each chimney presents its own conditions. Cost and timing can be influenced by chimney height, roof access, the liner diameter and grade required, the amount of building work around the fireplace, and whether a new hearth or ventilation provision is needed.
A low, easily accessed chimney with a clear route is usually more straightforward than a tall property with difficult roof access or several chimney offsets. The most useful quote is one prepared after a proper survey, with the scope explained in plain English. It allows you to compare like for like and understand exactly what is included.
Why professional installation gives peace of mind
A stove installation combines fire safety, structural considerations, flue design and Building Regulations. While flexible liners may appear simple from the ground, safe installation involves work at height, correct sizing, secure termination, appliance clearances and formal testing.
Choosing a HETAS registered engineer means the person fitting your system understands those responsibilities and can certify the completed work. At Stove Specialists UK, we take a safety-first approach from the initial survey through to commissioning, so homeowners can enjoy the warmth and character of a stove without carrying the technical burden themselves.
If you are considering a new log burner or upgrading an existing fireplace, start with a professional chimney survey. It will give you a clear answer on whether a flexible liner is suitable, what the installation involves and how to move forward with 100% peace of mind.