
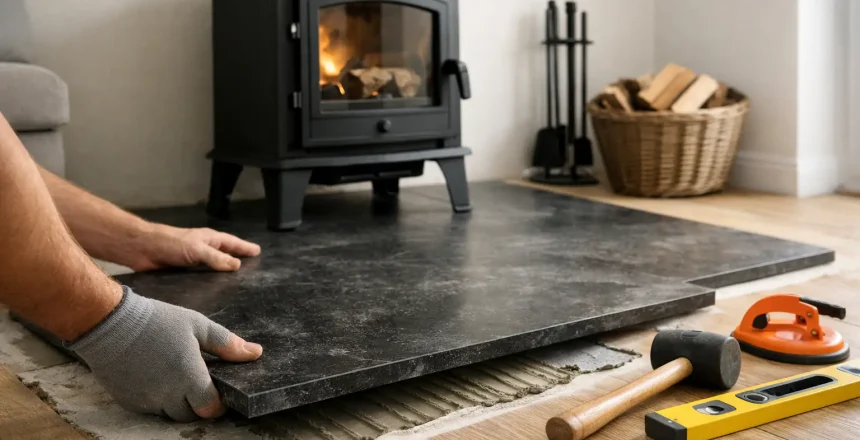
A hearth is not simply a decorative base for your stove. It is a heat-resistant safety zone that protects the floor, defines the appliance area and helps your installation meet Building Regulations. Knowing how to install a hearth correctly means getting the dimensions, materials, floor construction and stove clearances right before the appliance is put in place.
For a wood-burning or multi-fuel stove, the right hearth depends on the specific model, whether it sits within a fireplace opening or stands free in the room, and how much heat can transfer through its base. This is why a proper site survey is the safest starting point.
Start with the stove and the room
The hearth should never be chosen in isolation. Begin with the stove manufacturer’s installation instructions, which set out the required clearances and whether the appliance may be installed on a thinner superimposed hearth. Those instructions are central to a compliant installation and can be more demanding than the general minimum standards.
Next, assess the room. A solid concrete floor, suspended timber floor and tiled floor may each need a different approach. A hearth installed over combustible flooring needs particular care, because the finished surface is only one part of the protection required. The supporting structure beneath it must also be suitable for the stove’s weight and the heat it will receive.
If the stove is going into an existing fireplace, the opening, chimney route and the available projection in front of the opening all affect the hearth design. For a freestanding stove, you must plan the hearth footprint around the appliance, its flue route and the clear space needed to use it safely.
Understand the two main hearth types
UK stove installations commonly use either a constructional hearth or a superimposed hearth. The correct choice is based on the stove manufacturer’s instructions and the requirements of Approved Document J.
A constructional hearth forms part of the building structure. It is generally built from non-combustible materials such as concrete, masonry or suitable stone, and is traditionally at least 125mm thick. It is often needed where an appliance can transmit higher temperatures to the floor or where the stove is fitted in a fireplace recess.
A superimposed hearth sits on top of the finished floor. Slate, granite, glass, porcelain and stone are popular choices, provided the material is non-combustible and suitable for the installation. A 12mm hearth may be acceptable only when the stove has been tested and specified by its manufacturer as safe for this type of installation. Do not assume that a thick-looking tile or decorative slab automatically meets the requirement.
The trade-off is straightforward. A thinner hearth can create a clean, modern appearance and reduce building work, but it is only suitable for certain appliances. Where the stove or floor construction calls for a constructional hearth, choosing a thinner option for appearance alone can create a safety and compliance issue.
How to install a hearth correctly: size it before fitting
Hearth dimensions are one of the most commonly misunderstood parts of a stove installation. The hearth must extend beyond the stove or fireplace opening far enough to protect the surrounding floor from heat, ash and any fuel that may fall when the door is opened.
For many freestanding solid-fuel stoves, a hearth is typically required to project at least 225mm in front of the appliance and at least 150mm to each side. A minimum overall hearth size of 840mm by 840mm is often used for this type of installation. However, these figures are not a substitute for checking the appliance instructions and the exact layout of the room.
Where a stove is installed within a fireplace recess, the front hearth will usually need a greater projection – commonly 500mm in front of the opening – with suitable extension to either side. The opening size, stove position and manufacturer guidance all matter here.
The hearth should also have a clearly defined perimeter. This can be achieved through a noticeable change in material or level, helping everyone in the household recognise the protected stove area. A flush finish can look excellent, but it still needs to be visually obvious where the hearth begins and ends.
Before any material is cut or laid, mark the planned hearth area on the floor. Place the stove position within that outline, allowing for the flue connection and the clearance to nearby walls, beams and furnishings. This simple step prevents a hearth that technically fits the stove but leaves too little safe space around it.
Choose non-combustible materials that suit the build
Natural slate remains a popular hearth material because it is durable, understated and suits both traditional fireplaces and contemporary stoves. Granite, stone and suitable porcelain can also work well. The final choice should be based on heat suitability, thickness, load-bearing strength and the look you want in the room.
Large-format tiles need a stable, level base. Any movement in the floor beneath can lead to cracking, particularly on suspended timber floors. Stone slabs are heavy and need adequate support, while glass hearths require precise fitting and a perfectly suitable substrate. The right material is therefore not just a style decision.
Avoid using ordinary laminate, carpet, timber, vinyl or other combustible finishes within the hearth area. If the existing room floor is combustible, it may need to be cut back, protected or built up beneath the new hearth. The finished installation must provide the required non-combustible protection, not merely cover the surface.
Prepare a level, strong base
A hearth that rocks, slopes or has gaps beneath it is not ready for a stove. The base needs to be clean, level and capable of carrying the combined weight of the hearth and appliance without movement.
On a concrete floor, preparation may involve removing the existing finish, levelling the surface and bedding the hearth material on an appropriate non-combustible base. On a suspended timber floor, the work can be more involved. The floor structure may need strengthening, and the hearth arrangement must prevent excessive heat reaching combustible material below.
For fireplace installations, the existing hearth is not automatically suitable just because it is made from stone or concrete. Older hearths can be too small, damaged, poorly supported or incorrectly positioned for a modern stove. A survey allows the installer to check what is beneath the visible surface rather than relying on appearances.
Fit the hearth and keep the stove clearances intact
Once the base is prepared, the hearth can be set in place and checked carefully for level. A stove must sit squarely and securely. Even a slight imbalance can affect the way the appliance performs and make the finished installation look poor.
Do not position the stove right at the rear edge of the hearth to gain more room. The appliance must remain within the required protected area, while also maintaining the manufacturer’s stated distances from combustible walls and surfaces. These distances vary considerably between stove models, particularly around the sides, rear and flue pipe.
Where heat shielding is used near a wall, it must be designed and installed correctly. A shield is not a quick fix for an unsuitable layout. It needs the correct material, air gap, fixing method and dimensions to achieve the intended clearance reduction.
Finish with the compliance checks that matter
A compliant stove installation is about more than the hearth. The flue or chimney system, ventilation provision, distances to combustibles and the carbon monoxide alarm must all be checked as part of the completed work.
In England and Wales, solid-fuel appliance work must comply with Building Regulations. A HETAS registered installer can self-certify qualifying work and provide the appropriate certificate for your records. If the work is not completed through a competent person scheme, Building Control involvement is normally required. This paperwork is valuable when you sell the property and gives reassurance that the installation has been assessed properly.
A carbon monoxide alarm is required in the room where a new or replacement fixed solid-fuel appliance is installed. It should be positioned and specified in line with the relevant guidance, rather than placed wherever there happens to be an empty wall.
When professional installation is the sensible option
Installing a simple hearth may appear manageable, but it becomes a technical job when floor construction, stove clearances, flue positioning and Building Regulations are considered together. This is especially true in period properties, homes with timber floors, new-builds and rooms without an existing chimney.
A HETAS registered engineer can assess the whole installation, advise on a hearth that works with your chosen stove, carry out the necessary building work and provide certification on completion. Stove Specialists UK takes this end-to-end approach so homeowners receive a practical, compliant installation with 100% peace of mind.
A well-proportioned hearth should look as though it has always belonged in the room, while quietly doing the essential work of protecting your home. Plan it around the stove, not around a convenient off-the-shelf size, and you will have a safer foundation for years of comfortable heating.